I promised you a chair before and after, and by golly, I will deliver!
I am also giving you a semi-how to! Lucky you, right?
So, here is the before.
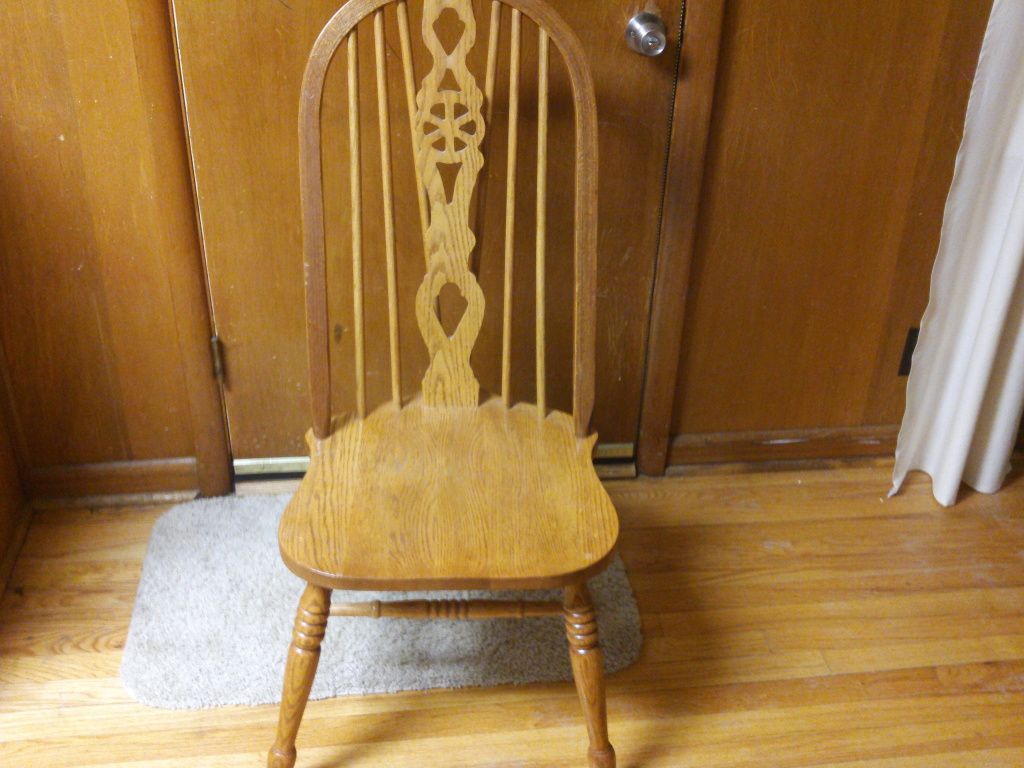
These chairs are made of real wood, which really helps with what I am about to show you. The texture of the material of the furniture does matter, for a couple reasons. First, since it's real wood, you don't have to do much preparation for it (AKA, no sanding and no primer!). Second, when you distress it, the real wood shines through OH so nicely!

These are the materials I used with my chairs. Not pictured is this...
I will warn you, this looks beautiful, but it is oil based. Which doesn't mean a whole lot, except once you've used your brushes for oil based products, they are hard to clean. I prefer all of my materials that I use with brushes to be water based, purely for the ease of cleaning up (just a little soap and water.) I am sure there are other differences, but that's all I know of for now. I found this out the hard way, as I attempted to clean my brush, only to figure out seconds later with incredibly oily hands, my mistake. Moving right along.
Since my chairs were in excellent condition, I didn't do any sanding before I painted. I also didn't use a primer, but I did try Krylon Dual Spray Paint in Ivory Gloss. You can find all of Krylon's Dual Spray paint at any Walmart. Truth be told, I don't know that this covered any better than Rustoleum's brand. To be entirely truthful, the nozzle wasn't to my liking. It was very small and the cost was about a dollar more than Rustoleum's brands. I am not getting paid to endorsed either of these products, that's just my own opinion. FYI, the nozzle issue was put to rest when I bought one of these VERY cheap bad-boys...

Totally worth it if you are doing alot of spray painting!
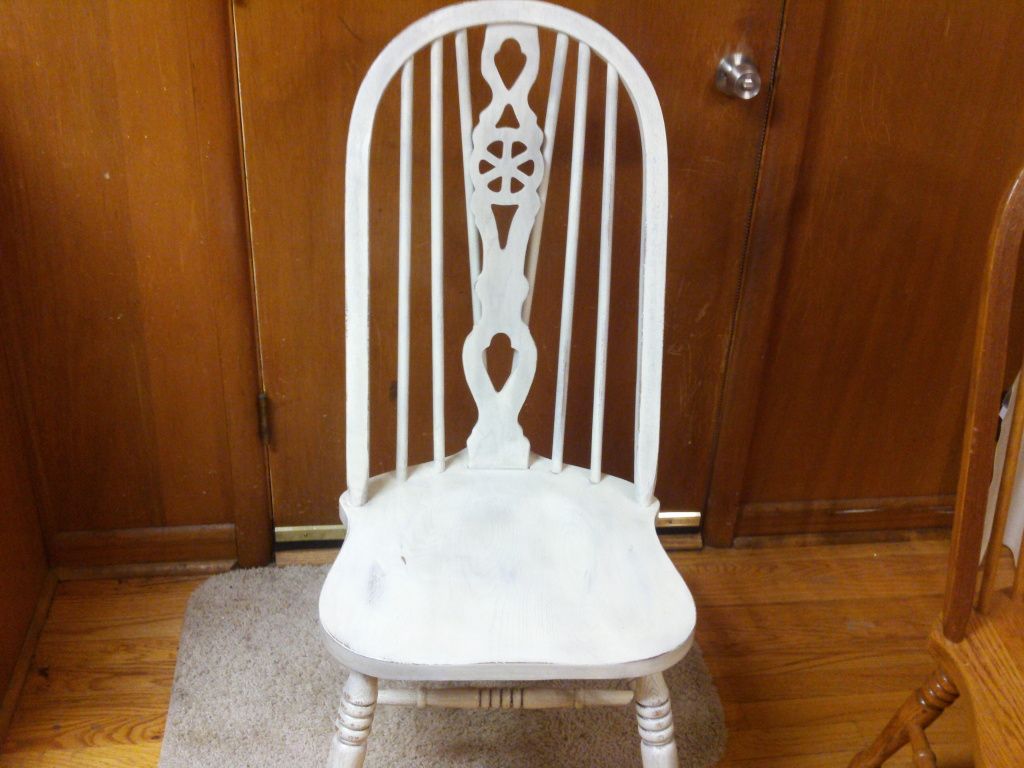
Each of the chairs got about 2 coats, and one can did one chair. I have 6 chairs, so the paint alone cost me about $30. I wish I had an actual spray gun, you can certainly get more bang for your buck with a gallon of paint vs. spray paint! But it's so much easier than using a brush. After the initial painting, this is what I ended up with...
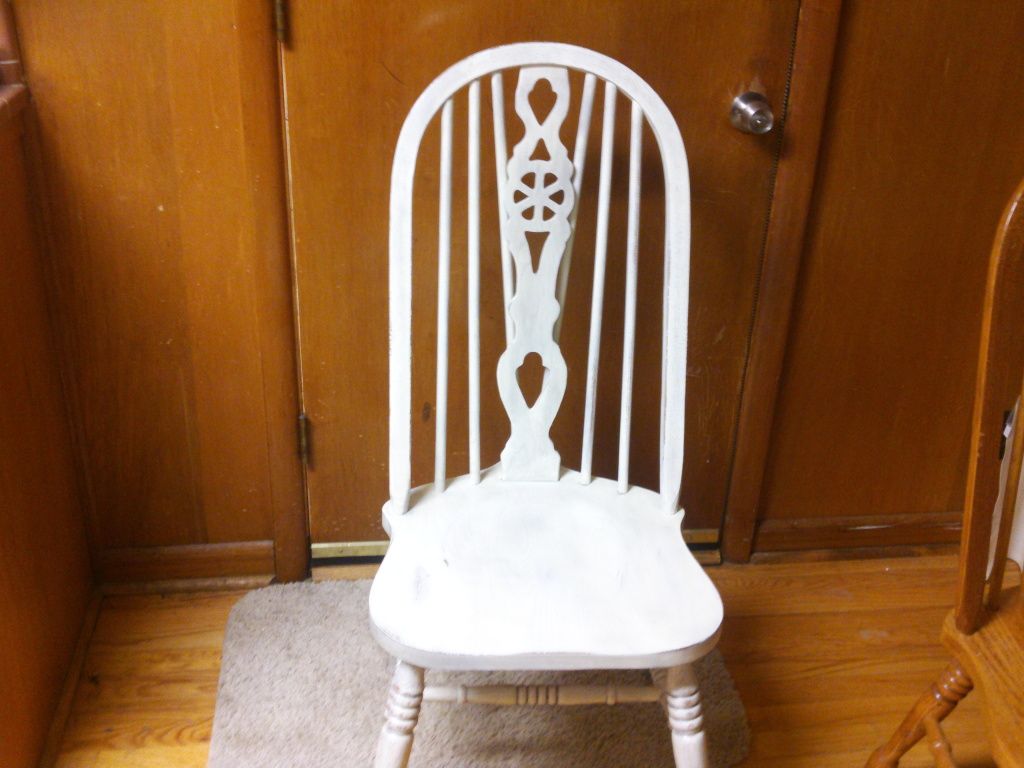
The color ended up being alot brighter than I envisioned. But that's OK because the next part solved all of that...
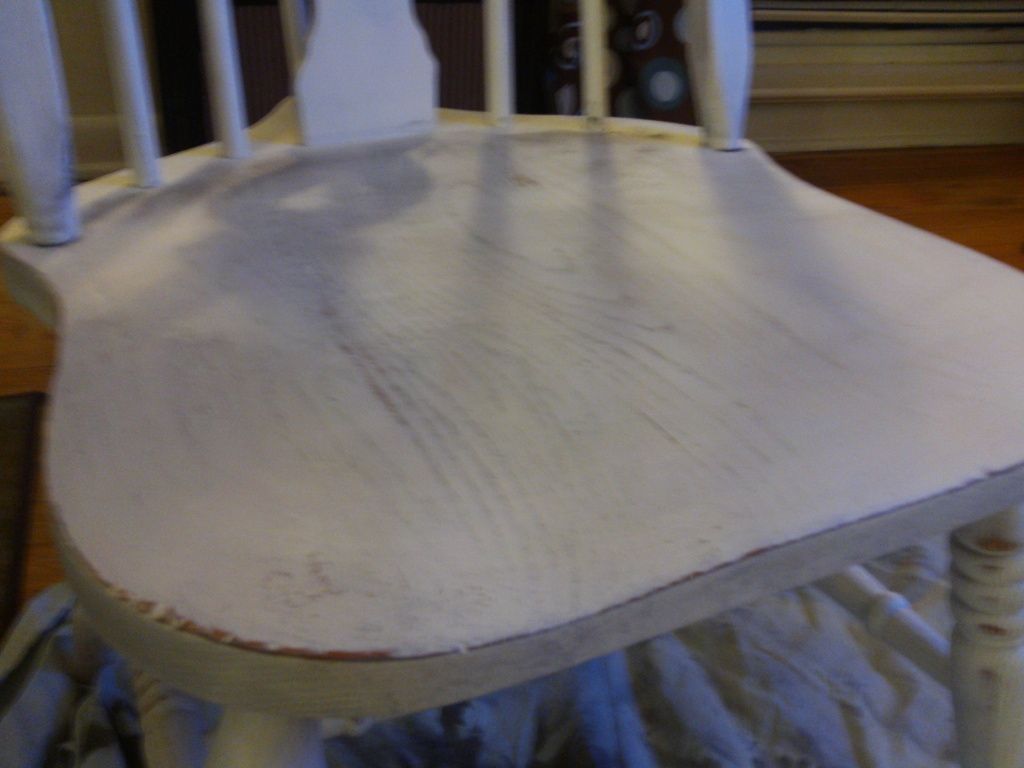
Distressing. It's a good thing! Especially with wood pieces such as these. I took a sanding block...
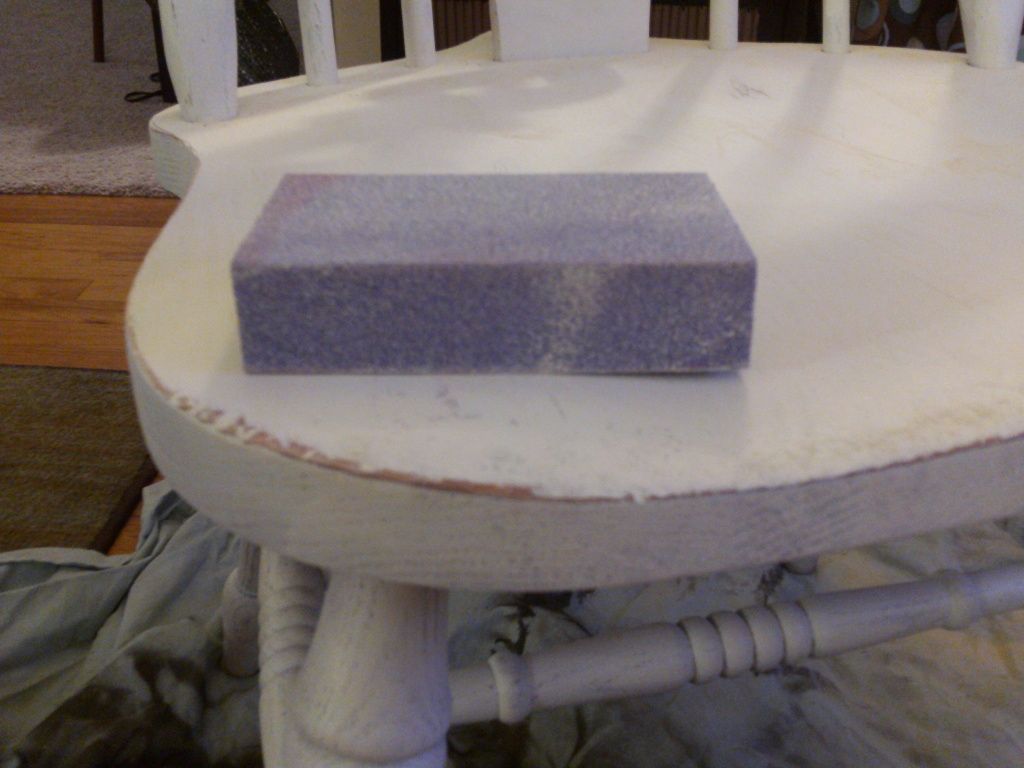
And went to town. I got around all of the edges, some spots on the seat itself. You can really distress each as much or as little as you see fit. I began to realize that the more I distressed it, the more the glaze would have to stick to. So I tried to distress it as much as I could. For those of you who don't know, distressing just means that all of the work you did to get even coats of paint the first time around just went to waste because you actually sand it OFF, down to it's original layer. I know, I know. Distressing just makes a piece of furniture look weathered. Alot of work to make a new piece look old, right?
The next part, I was really excited about. But I was a little nervous. I had no idea how to buy glaze or mix glaze. I went to Home Depot and found that they only had one brand and it was a whole gallon. I did NOT need that much glaze! Plus, I had no interest in spending $25 for it either. Glaze comes clear, so not only do you have to buy it, but you also have to buy paint to mix into it. I think after this, it might behoove me to get a gallon of it. You can make glaze any color you want. But for ease, and my pocketbook, I opted on Martha Stewart's Metallic Glaze in Black Coffee. It was only $5 for the container and believe me, it will last me a long time.

When I first put it on, I was a little set off by how dark it was. But it turned out great. With glaze, you basically just take a brush and paint it on the piece. It isn't like painting with paint, as the coat doesn't need to be perfect. In fact, you can do as much or as little as you want. But the point of glaze is to bring out the chairs imperfections with the wood and also, the little grooves of the piece itself. So make sure you pay attention to those things. You brush it on...
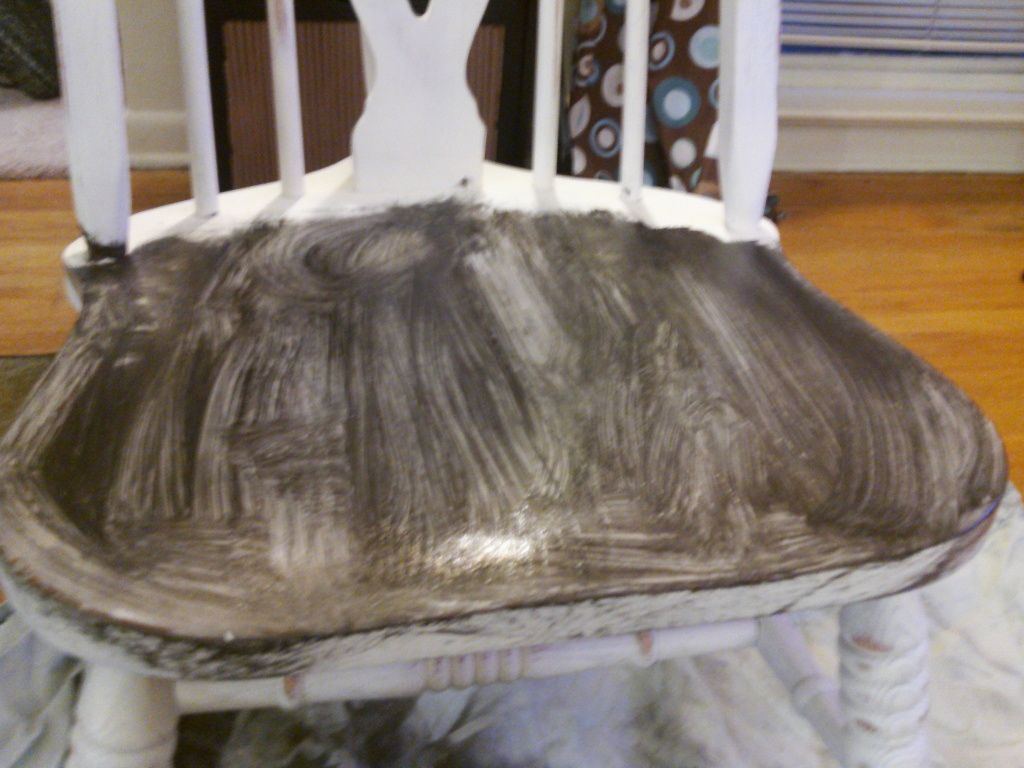
And before it can dry, take a wet cloth (that you don't mind throwing away) and wipe it off. That means, you need to do this in sections because you want it to stay wet, or else you won't be able to clean it back off.
And what you are left with is a beautiful tint!

You can tell in these pictures the difference between the chairs when you just paint vs. distressing and glazing. It brings a whole new element, don't you think?
Afterwards, I just painted on a coat of poly. I will probably paint one more, just for good measure.
Voila! I wish I had better lighting, you could see this so much better...

And just for good measure, I took a picture of all three chairs, side by side.
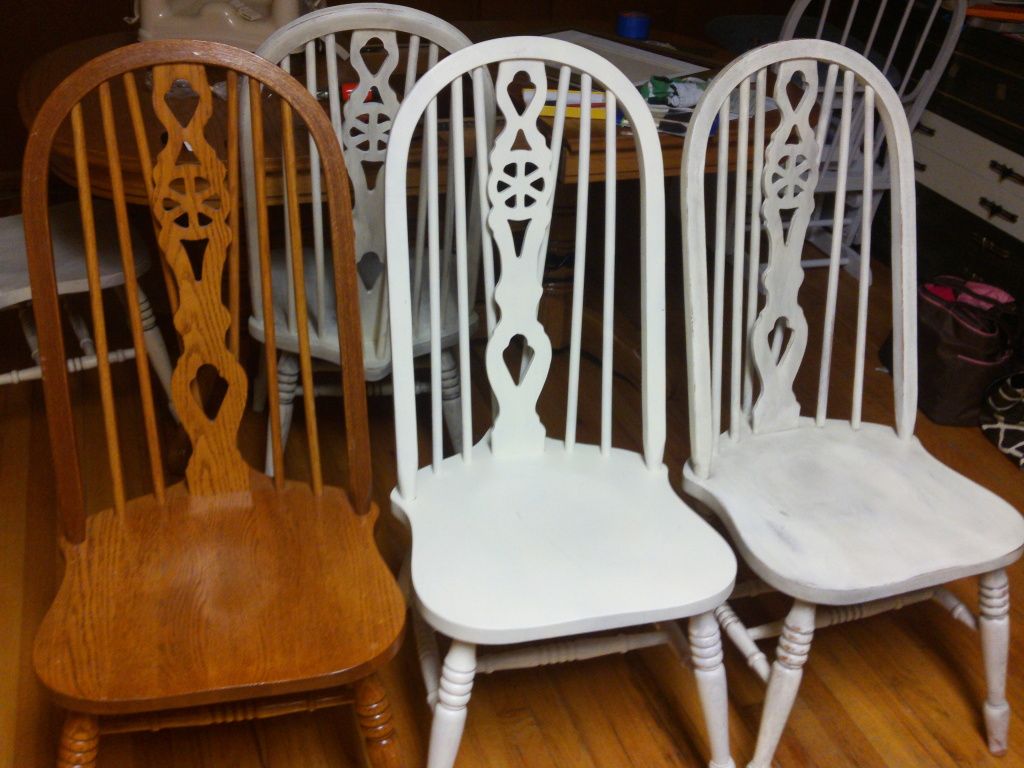
Just a mess in the background, I know! But it's getting there!
Comments